By Lindsay Carmichael from One Bite too Many
It’s
that time of the year again… You know, the sugary months between discount
Halloween candy and New Year’s resolutions, where you can you barely turn
around without someone offering you a piece of chocolate or a buttery cookie. As an amateur pastry chef, I love this season
because it keeps me busy and I get to make a wide variety of goodies; but, as
an adult, I prefer quality over quantity.
I dread the onslaught of treats that never seem to satisfy as they are
filled with poor quality ingredients, artificial extracts, and 10 different
kinds of sugar that leave you wanting something more. If you’re going to indulge, wouldn’t you
rather have a piece or two of homemade candy that is made with real butter and
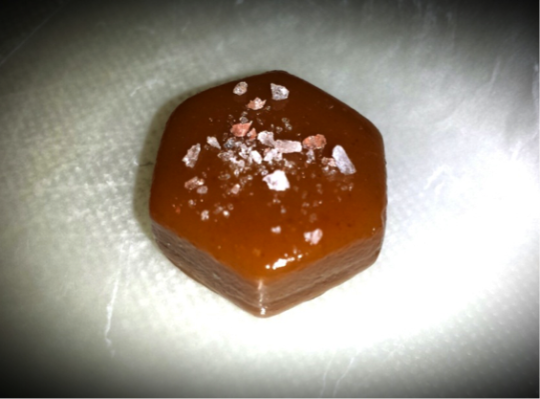
cream, that satiates your sweet tooth, and that has a grown-up flavour? Enter my Salted Earl Grey Caramels, made with
Rishi Tea’s Earl Grey Supreme.
EQUIPMENT
2 Saucepans (1 small, 1 medium)
Candy Thermometer
8”x 8” baking pan
Aluminum Foil or Parchment Paper
Wax Paper
INGREDIENTS
1 ¼ Cup
Whipping Cream
3-4 Tablespoons Loose Leaf Earl Grey (I used
Rishi Tea’s Earl Grey Supreme)
1 Cup Granulated Sugar
¾ Cup Glucose (Corn Syrup)
6 Tablespoons Butter, Sliced
1 Teaspoon Pure Vanilla Extract
Finishing Salt, for Sprinkling (I used pink Himalayan salt)
DIRECTIONS
1.
Line 8-inch square baking pan with greased
aluminum foil or parchment paper. Set aside.
2. In
a small saucepan, heat the whipping cream and Earl
Grey over medium heat for 7-8 minutes or until bubbles
appear on surface. Allow the cream
to gently boil for 2
minutes, then leave to infuse for
an hour.
3. Once the
cream has been infused, strain it. Make sure to
press the damp tea firmly in the
sieve to wring out the extra
flavour. Measure 1 Cup of the Earl Grey cream and
place it
in a medium saucepan.
4. Add the sugar,
corn syrup, and butter to the cream. Mix
well to get rid of any lumps.
5. Using a pastry
brush dipped in cold water, wipe the inside of the saucepan so that there isn’t any sugar left above the
mixture. This prevents crystallization.
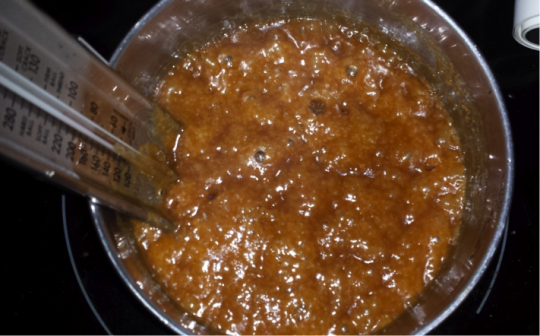
6. Clip a candy
thermometer to the side of the pot and turn the heat on to medium-high. Bring
the mixture to a boil, stirring occasionally.
7. Once
the mixture boils and the sugar is discoloured, lower the
heat to medium-low and allow to slowly boil until the thermometer reaches 242º-245ºF, or when a small amount of mixture dropped into ice water forms a firm ball (about 20 minutes).
8.
Remove from the heat and stir in
vanilla. Beat until slightly thickened.
9. Pour the caramel into the prepared baking pan.
Let it cool completely.
10. An hour into
the cooling process, sprinkle finishing
salt on top of the caramel.
11. After it has completely cooled (2-3
hours), cut into small pieces using an oiled knife. Wrap each piece of caramel in wax paper and
twist the ends. Store in an airtight container in the fridge for up to 3 weeks (if they last that
long!).